Section 8.2 Constructors
To be useful, instantiated objects must be able to declare and manage their own data. This begins with the declaration of a special, method-like construct added to a class definition called a constructor.
Subsection 8.2.1 Anatomy of a Constructor
A constructor is a block of code that is invoked when an object is instantiated using the
new keyword. The statements in the constructor perform important initialization tasks required when an object is instantiated. Figure 8.2.1 outlines the unique makeup of a constructor and its five critical features.
- The name of a constructor must match the name of its class.
- Constructor parameter declarations are no different than method parameters.
- A constructor has no return type, not even
void. - There can be no
returnstatement in a constructor. - To access the current object being initialized, use the scope defined by the this keyword.
Subsection 8.2.2 The this Keyword
As a demonstration, let’s define a new graphic class named LED. This class will be a circular graphic object with a width and height of 30 pixels. The graphic is filled with gray when it is off and red when it is on. When deciding what to include in any class, we need to stop and think about what is necessary to adequately track the state of each instance. For an LED, we need to track whether it is on or off. We also need to manage its graphic representation, in this case using an Oval object.
In Listing 8.2.2 we start the definition of our LED by declaring a class named LED and two instance variables named
on and light. We call them instance variables because every instance will get its own copy of these variables. We did not use the keyword static when declaring them, which makes them instance variables. Using static would have made them class variables, defined within the scope of the class. Because there is only one of any class, there would be only one of each static variable, regardless of the number of instances that are created.We also used the keyword
private instead of our usual public visibility modifier when declaring our LED instance variables. Using private ensures that instance variables are not accessible from outside each instance. Instance variables declared with private visibility may be accessed only from within the scope of an object. No access from outside the object is permitted. We now have two visibility modifiers for the declaration of class and object members, public and private.// LED.java (version 1)
// A simple LED display class
import doodlepad.*;
public class LED {
private boolean on; // Tracks state of LED object
private Oval light; // Visual display of object
}
LED.java (version 1)When we instantiate a new LED object we want to initialize these instance variables. That’s where the constructor comes in. Listing 8.2.3 adds an LED constructor to our LED class declaration.
// LED.java (version 2)
// A simple LED display class
import doodlepad.*;

public class LED {
  private boolean on;           // Tracks state of LED object
  private Oval light;           // Visual display of object

  // Constructor (**NEW**)
  public LED(double x, double y) {
    this.on = false;            // Init instance variables
    this.light = new Oval(x, y, 30, 30);
    this.light.setFillColor(100, 100, 100);
  }
}
LED.java (version 2)Let compare our added LED constructor to the critical features given in Figure 8.2.1.
- The name of the constructor matches the name of the class,
LED. - Two parameters are declared just like any method.
- There is no return type, not even
void. - There is no return statement in the body of the constructor.
- And finally, instance variables are accessed from within the constructor using the
thisscoping keyword.
The expressions
this.on and this.light access and initialize the instance variables declared outside the scope of the constructor but within the scope of the object. All constructors must follow the same rules listed in Figure 8.2.1.Let’s add a
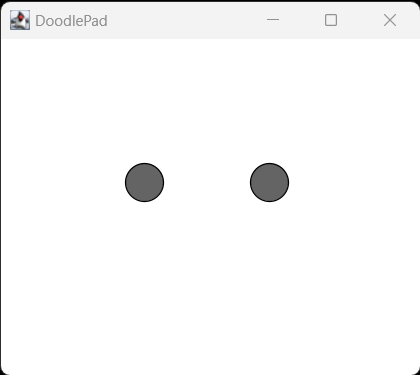
main(…) method to test our initial Java LED class. It is convenient to add a main(…) method to a class for testing. As we’ll see later, as our programs grow, we rarely invoke an individual class’s main(…) method in favor of using a special driver class with its own main(…) method designed specifically to start a program.To test our class, in a
main(…) method we create two LED instances at different locations. See Listing 8.2.4 and Figure 8.2.5. As expected, in Figure 8.2.5 two LED objects are shown at the given starting locations with an initial dark gray fill color.// LED.java (version 3)
// A simple LED display class
import doodlepad.*;
public class LED {
private boolean on; // Tracks state of LED object
private Oval light; // Visual display of object
// Constructor
public LED(double x, double y) {
this.on = false; // Init instance variables
this.light = new Oval(x, y, 30, 30);
this.light.setFillColor(100, 100, 100);
}
}
// --- Test LED (**NEW**)
public static void main(String[] args) {
// Create LED objects
LED led1 = new LED(100, 100);
LED led2 = new LED(200, 100);
}
LED.java (version 3)javac -cp doodlepad.jar LED.java java -cp .;doodlepad.jar LED
LED.java (version 3)